This tutorial is available in PDF format.
In this video, Raquel Redmond from Brava Art Press shows how to create a clay sculpture project that incorporates facial expressions and a sense of humor.
Chroma 2 Washable paint has been used in this painting tutorial.
Art Technique
Drawing and clay modelling
Age Group
5 to 12 years of age
Concept
A practical experience to draw cartoons and then create a clay character made out of clay.
Sessions
4 sessions—drawing cartoons; modelling clay; painting and drawing with crayons.
Room arrangement
Group desks in lots of four to create space in the centre and cover desks with secured sheets of plastic or single sheets of newspaper.
Materials: 1st Session – Drawing With Black Pens
- 4 or more A4 pieces of paper per student
- 1 black medium point felt pen per student
- 12 B/W A4 photocopies of faces from newspapers, books or magazines per group of 5–6 studentst
Materials: 2nd Session – Clay Modelling
- 2 x 10kg slabs of student quality clay, to be divided up in a class of 25
- 1 metre of flexible wire or strong string to cut through the clay
- 2 paddle pop sticks per student
- 1 A4 sized piece of thick fabric, or plastic material per student for the clay work to be placed on the desks
- 1 x 1 litre ice cream container per student to place clay works in when painting and and for transporting the clay works
- small newspapers to cover desks
- 2 containers of water per group of 5–6 students
- 1 roll of masking tape to secure the newspaper
- 1 x 9 litre bucket (standard household bucket) of water for clean up
- several rags or cut up old towels for clean up
Materials: 3rd Session – Painting
- 11 x 2 litre Chroma 2 Washable paint in the following colours: warm and cool red, warm and cool blue, warm and cool yellow, black and white. This set of paint should be sufficient quantity to supply a class of 25 students for one year and can be used across a variety of different art techniques. The primary colours will also mix all secondary colours and many more.
- 1 medium sized paint brush per student
- 1 small sized paint brush per student
- 1 small rag per student for cleaning of hands and work area
- 1 container of water per group of 5–6 students
- 2 ice cube trays or small plastic containers with lids per group to contain paint. Refer to the video ‘Art in the Classroom’ to get ideas on how to dispense paint to the class.
- small newspapers to cover desks
- roll of masking tape to secure the newspaper to the desks
- 1 old extra large t-shirt to wear over uniforms or an art smock
Materials: 4th Session – Drawing with Oil Pastels
- 1 A3 size cartridge paper sheet per student
- 2 boxes of oil crayons per group of 5–6 students
This project has been designed to suit normal classroom conditions and illustrates how the classroom can be adapted to create working space required.
Objective
This project offers the students the opportunity to create a character in 3 dimension; to learn about exaggerating the features on the human face and modelling clay by hand. Students will initially draw several cartoons with exaggerated features using black pens, prior to making their clay caricature.
Visual references
Source references of people from magazines, newspapers, cartoons or books and photocopy them as required. If possible, also refer to artists such as Paul Klee and his puppets; the caricatures of artist Honoré Daumier, and paintings and drawings by artist Jean Dubuffet.
ROOM SET-UP AND PREPARATION
Prepare all the art materials in advance. Cut the clay into lumps; prepare and source all the necessary equipment listed in the materials column on this page.
Before presenting the project to the class, teachers should photocopy their references of people at A4 size, to have sufficient quantities available for each of the students participating in the activity. Each group of 4–6 students should have a bank of photocopies to share and refer to.
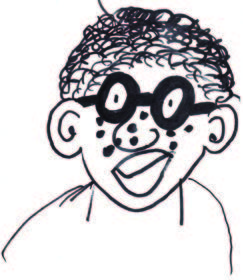
Student example of drawing
First Session – Drawing With Black Pens
Show visual references and discuss the various features of the face. If you have access to a supply of small plastic mirrors, allocate a mirror to each of the students so they can see their faces closely and they can experiment with ‘making faces’.
As an introduction to the 3D Cartoon project, students will draw faces with medium thickness black pens onto sheets of A4 white paper referring to the black and white photocopies and will then transform the faces using exaggerated features and expressions such as a pointed nose, eyes that ‘pop’, big ears, large teeth, raised eyebrows and funny hair.
It is better for students to draw and experiment in black pen on paper first. Drawing with black pens will help them to create characters in a spontaneous and direct way. If students use pencils for this exercise, they will be tempted to erase their drawings many times and as a result, their line work will be hesitant rather than spontaneous and fluid.
Some very young children might not refer to their drawings but rather create their characters as they work with the clay. This shouldn’t matter as they will enjoy both of the experiences—that of drawing cartoons with black pens and then manipulating and working with the clay.
Second Session – Clay Modelling
The room set up will be the same as the first session and all the clay and equipment would have already been dispensed on the tables ready to go.
Each of the students will have two lumps of clay about the size of a large orange. One will be used to create the head and the other will be for the shoulders and features. (1 and 2)
They also will have a piece of thick fabric or plastic where to place the clay so that it doesn’t stick to the newspaper. If working with young children, prepare the clay by shaping it into two balls and make sure that the clay is moist and soft. It is helpful to engage two or three parents to assist when working with students from years one to year three.
Show students how to make the lumps into balls by rolling the clay on the mat using a circular motion. It is better that the two parts are joined together before starting to work on the features. Keep one ball rounded and flatten one end of the other ball by pressing gently on the table to allow the shoulders and head to stand up right, then join the two pieces. Insert a paddle pop stick in the middle of this piece of clay and then place the second ball of clay onto it. It is a good idea to provide the students with ice cream containers to place their clay work in for easy maneuvering, storage and transporting the clay characters back to the shelves for storage.
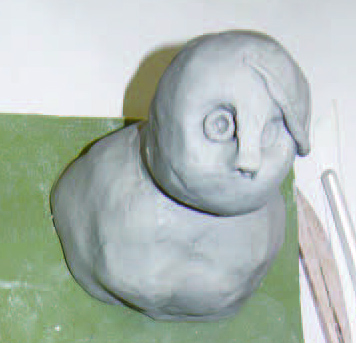
When the head and the shoulders are joined students will then commence to add the exaggerated features.
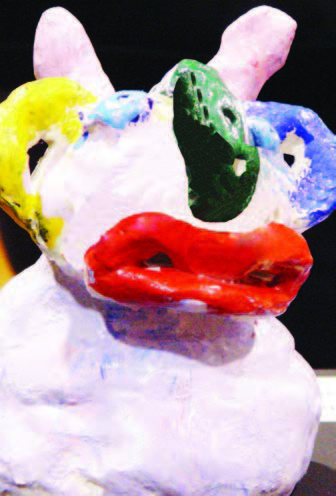
If the school doesn’t have access to a kiln, it is recommended to paint the clay character all over with PVA glue to make it stronger. Please allow the clay to then air dry over few days prior to painting. (3 and 4)
Third Session – Painting
At this stage, the clay heads will be ready for painting. Place the paint and equipment in the middle of the grouped desks and give the students their air dried characters.
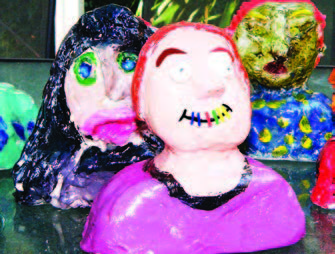
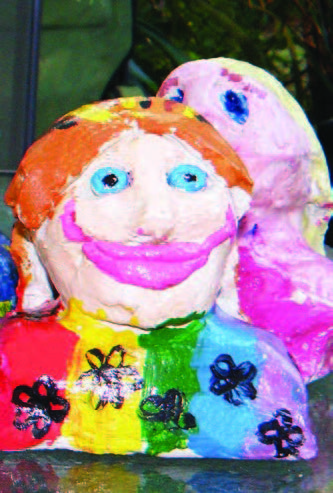
Students will place the clay on top of newspaper or on top of an upside down ice cream tub and will start to paint the big areas with medium sized paint brushes and then add the detail, such as the eyes, mouth, hair, and clothing with the smaller paint brush. (5)
At the end of painting session, students can carry their wet clay safely back to the shelves, inside the ice cream containers.
NOTE: After the clay character has been painted and has thoroughly dried, apply a coat of acrylic varnish for a glossy finish.
Fourth Session – Drawing With Oil Crayons
When making 3 dimensional objects there also presents an opportunity for another drawing and observation session.
It is good practice to encourage the students to approach the same theme in different ways as in this case, 2D and 3D representations.
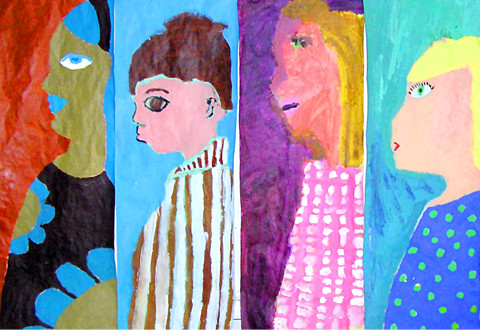
In the last session, students will group their characters in the centre of the table and then refer to this ‘grouped still life’ to create a line drawing using one of the coloured crayons. They will then draw the grouped clay characters from side to side and then change perspective, and view from top to bottom onto an A3 sheet of paper. After the line drawing has been completed, it will be time for them to apply colour and have even more fun. (6)
1. Exaggerated facial features being worked into the clay.
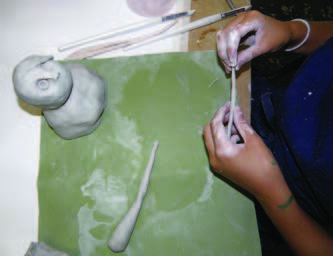
2. Student rolling pieces of clay to use as lengths of hair on the character.
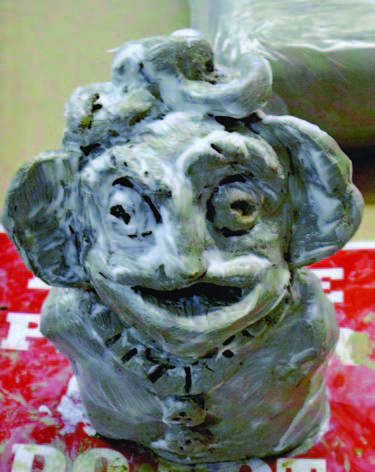
3. Clay character covered with a layer of PVA glue.
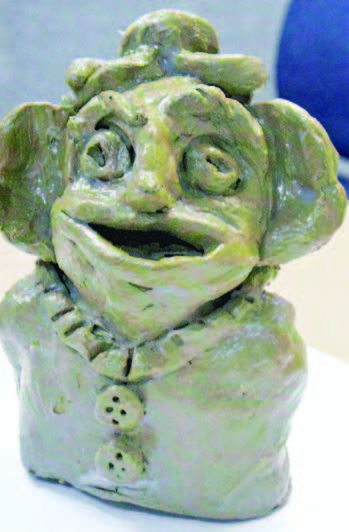
4. The clay character is much stronger after the PVA glue has been applied.
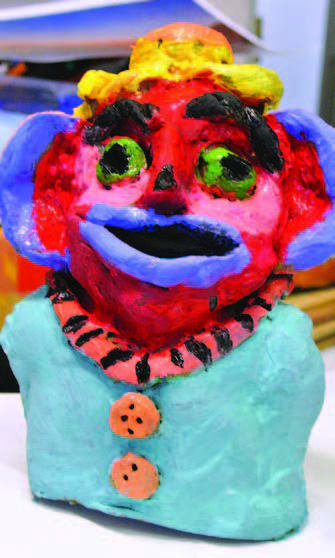
5. Painted clay character.
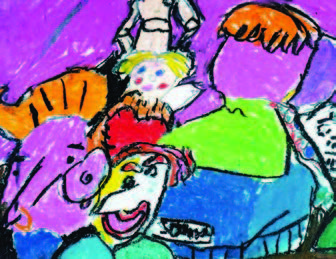
6. Coloured drawings depicting the grouped clay characters.
Student Example
Student Example
Student Example