Art Lesson Plans
The Art Lesson Plans created by Brava Art Press showcase an inspiring array of creative options. From the Art of Construction to Linocut printing. The Lesson Plans use only Chroma educational products. We hope you enjoy and are inspired by the creative originality they offer.
This tutorial is available in PDF format.
For very young students printmaking is a source of fascination and challenge. Opposite to drawing and painting, printmaking is an indirect process. To make a print, something has to be done to one surface; the block, in order to produce an effect on another surface; the paper.Cutting and gluing card to form a block, rolling the ink and transferring the image onto the paper becomes a ‘kind of magic’ that students love. If young students have had enough experience in cutting paper they will be able to produce a card print.
Chroma 2 paint has been used in this painting tutorial.
Art Technique
Card Printing
Age Group
6-13
Concept
Students draw, cut and glue shapes to create a collaged card block for printing, and become familiar with the concept of producing multiple images.
Sessions
4 sessions of 1½ hours each. This project can be implemented over a 4 week period.
Materials
- Cardboard — (straw board) A4 size approximately 2mm thick. Allow one piece per student to use as a block
- 1–3 pieces of easy-to-cut cardboard, (cereal boxes, recycled manila folders are ideal) from which to cut out shapes to create the collage
- 1 pair of scissors per student
- Plastic containers for glue. Allow 2 containers per group of 6 students
- 1 litre of PVA glue. Pour approximately
- 100ml into each plastic container
- 1 #6 hog hair paint brush per student—
- used for glue application
- 8 foam trays (fish and chip trays are ideal to roll up paint
- 4 foam rollers 85mm wide
- 2 litres of black (or any other dark colour) Chroma 2 student paint
- Paper — A3 size white cartridge 3 or 4 pieces per student to print on
- Newspaper to cover the tables in the printing area
- Masking tape to tape newspaper or plastic sheets on tables
- String and clothes pegs to hang prints on to dry — a clothes drying rack is an alternative
- A bucket of water and rags for cleaning up
This project has been designed to suit normal classroom conditions and illustrates how the classroom can be adapted to create working space required.
This tutorial is available in PDF format.
{/sliders}
Technique
Discuss with your students themes and ideas suitable for card printing. Explain and demonstrate techniques to make and then print the block.
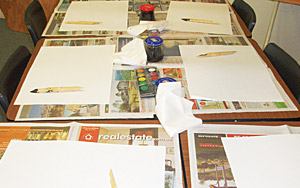
Room arrangement
The first task that the teacher will be confronted with will be establishing an appropriate work area. The printmaking arrangement of the classroom consists of four separate areas:
Preparation area – for constructing the block – cutting and gluing by the students at their desks, arranged in groups of four.
This project has been design to suit normal classroom conditions and illustrates how the classroom can be adapted to create working space required.
Inking area – for inking the block – a table covered with newspaper and set up with four sets of foam trays. Each set of trays is comprised of two trays—one tray into
which the paint is placed to roll up and the second tray into which the block is placed while the paint is rolled onto it.
Printing area – a clean, dry table where the A3 cartridge paper is placed
and printed on with the paint coated
block facing up.
Drying area – an area where clothesline or string can be strung
and the prints hung secured with
clothes pegs for drying.
1. Room arrangement
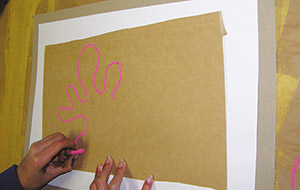
2. Drawing large shapes onto the card

3. Cutting the drawn shape
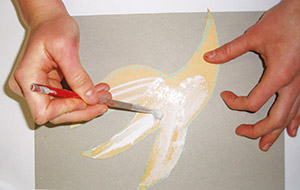
4. Gluing the cut out shape
Preparation of the card block
- At the desks students draw big and simple shapes with chalk on manila folders, card or cereal boxes andthen cut out the shapes (2 and 3)
- Glue shapes to the A4 card and allow the glue to dry over night (4)
- It is important to divide the students in to small groups of four, to print. One or two parent volunteers shouldbe engaged to help organise the room and to supervise the students during the printing process.
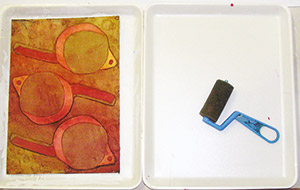
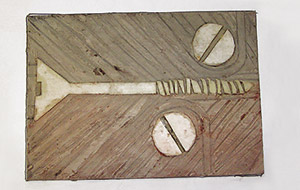
5. Block sitting in tray ready for the paint to be applied
Printing
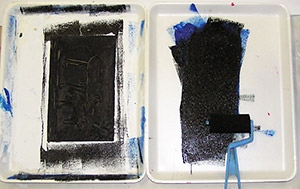
- Spread some of the acrylic paint in the roll up tray and roll the paint out in the tray with a foam roller using up and down strokes (6)
- Place the block in the other tray and ‘ink’ it using the paint, by rolling the roller over it several times in different directions—make sure all edges and corners of the block are covered with paint (6)
- Take the block to the printing table and place it with the inked side facing up. Place a piece of A3 cartridge paper gently over the block and rub the back of the paper evenly with a flat hand, being careful not to move the paper (9)
- Gently peel the paper off the block (10)
- Repeat steps of rolling out the paint and inking the block to produce more prints. Students should produce between three or four prints
- Take the print to the drying area and hang it up until completely dry.
Outcome
At the completion of the printmaking workshop, students would have learnt to simplify and enlarge shapes and to organise them within a space to create a design for printing.
- Students should be familiar with the basic technique of printmaking; making a block and transferring the image onto paper and to become familiar with the process of creating multiple images from the one block
- Students may use this printmaking experience to develop their evaluation skills
as together they view and critique their finished art work - Teachers will have an understanding of the different aspects involved in printmaking, for example, the allocation of time and resources, art materials and equipment, room arrangement
and printing techniques. This experience will contribute to their visual art practice in the classroom environment.
6. Rolling up the paint ready to apply onto the block
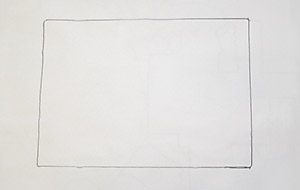
7. Printing set up showing A3 sized paper with area for the block marked
8. A3 paper with centred block facing up
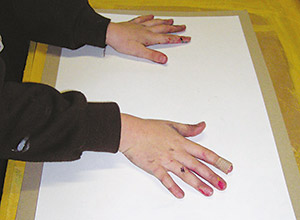
9. Gently rubbing the back of the paper whilst holding it in place with your free hand
Printing
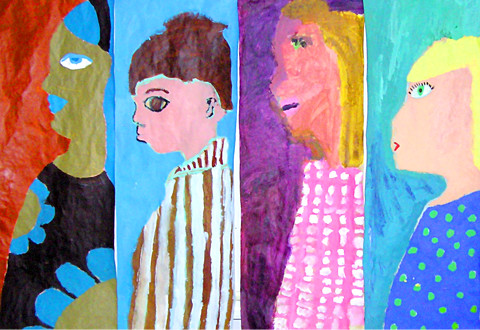
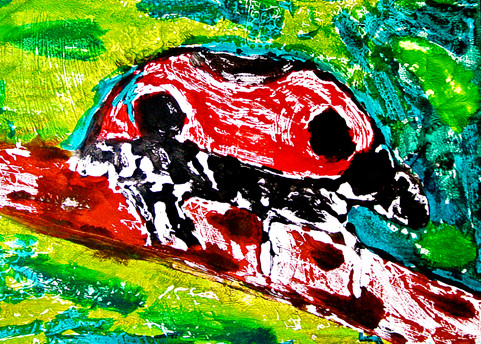
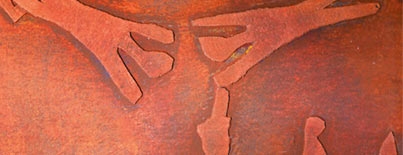
About the works in the gallery
The works in the students gallery is an example of the different themes that can be used for creative inspiration. For example nature,
the village, the park and the circus.
All tutorial information is © 2008 Raquel Redmond
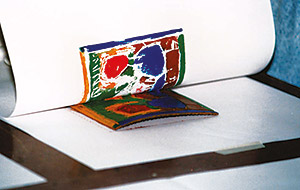
10. Pulling the print