Art Lesson Plans
The Art Lesson Plans created by Brava Art Press showcase an inspiring array of creative options. From the Art of Construction to Linocut printing. The Lesson Plans use only Chroma educational products. We hope you enjoy and are inspired by the creative originality they offer.
This tutorial is available in PDF format.
This project has been designed to suit normal classroom conditions and illustrates how the classroom can be adapted to create the working space required.
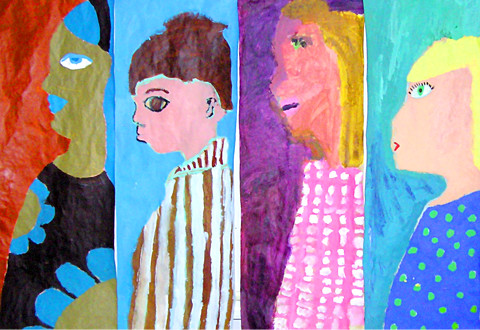
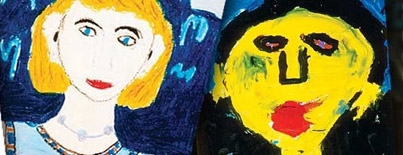
Young students express their thoughts, ideas and feelings about themselves and at the same time they develop their own symbols and techniques to create self portraits.
Chroma 2 paint has been used in this painting tutorial.
Art Technique
Painting
Age Group
6 to 14 years of age
Concept
Students use colour, line, shapes and textures to express personal ideas and feelings about themselves.
Sessions
2 sessions of 1 hour and 30 minutes each PLUS 1 session of 1 hour.
Room arrangement
Group desks in lots of four to create space in the centre and cover desks with secured sheets of plastic or single sheets of newspaper.
Materials
- 2 pieces of A3 cartridge paper or brown paper primed with Chromacryl gesso per student or
- 1 18 x 14 inch canvas per student
- 1 x 2 litre bottles of Chroma 2 paint in the following basic colours: white, black, warm yellow, cool yellow, warm blue, cool blue, warm red and cool red per class
- 1 #10 hog hair paint brush per student
- 1 #4 hog hair paint brush per student
- 1 plastic rimmed mirror per student
- 2 boxes of natural charcoal (willow charcoal) per class
- A rag per student for cleaning
- 2 water containers per group of 4 to 6 desks
- 2 ice cube trays containing a range of different coloured paint, per group of 4 to 6 desks
- 1 roll of plastic kitchen wrap to cover paint >trays at the end of each session
- 1 small newspaper to cover desks
- 1 roll of masking tape to secure the newspaper per class
- 1 or 2 pieces of scrap paper per
- student to mix colours
- 1 plastic bucket with soapy water
- 1 non-abrasive scouring pad to clean paint brushes
- 1 paint shirt or art smock per student
This project has been designed to suit normal classroom conditions and illustrates how the classroom can be adapted to create working space required.
This tutorial is available in PDF format.
{/sliders}
Objective
Create a self portrait based on ideas such as self esteem, identity, intimacy, heritage, ancestry and cultural background using charcoal sticks and paint.
Focus of attention
The student as an individual.
Visual references
Portraits by artists such as Van Gogh, Frida Kahlo, Picasso, Andy Warhol and any other portraits or reference, which you find inspiring. Visual references can be easily obtained from the school library or the internet.
Depending on the age group, students will require either more or less time to paint their portraits. Younger students will spend less time painting and their pictures will be less detailed. They will have little concern with adult concepts like space and proportion. Older students will attempt to express and record ideas about themselves in a more detailed way. To assist students to express their ideas visually, follow through with them the four steps of Motivation, Reflection, Perception and Technique.
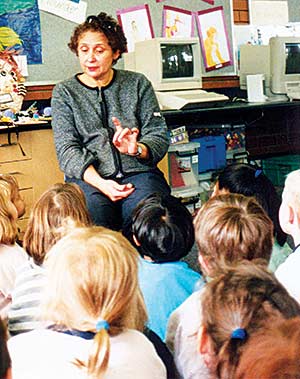
1. Teacher with art students
Motivation
Prepare for painting their portraits— gather the students in a group and encourage them to talk about the portraits on display, visual references, by asking questions. Base your questions on the steps of art criticism. (1)
Describe: What is the painting about? Is it a portrait? What does the person in the picture look like? Where is the person sitting/standing?
Analyse: What kind of lines, shapes, colours and textures has the artist used?
Interpret: What is the mood? Is this a happy painting? Is the person in the painting sad? How does it make you feel? (tense, energised, calm or relaxed?)
Judge: Do you like this painting? Why?
Reflection
Help the students to focus their thoughts on themselves by asking questions such as: Who are you? What is home for you? Have you ever felt lonely? Who are your best friends? Where do you play?
Perception
Discuss the various features of the face such as the different types of hair, the different shaped noses, the different coloured eyes and skin colour, and then, ask the students if they can describe them themselves.
Technique – How has the artist applied the paint?
With short brush strokes or with long brush strokes? Has the paint been applied with other tools such as sticks for example? What colours has the artist used? Are the colours dark, or bright, realistic, or expressive?
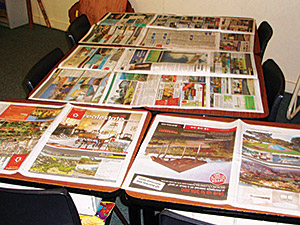
2. Room arrangements
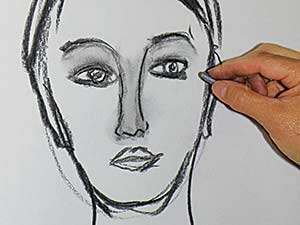
3. Drawing the face using charcoal
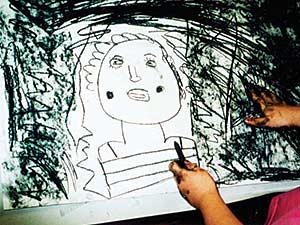
4. Creating texture and shading using charcoal
First Session
- Using a charcoal stick show students how to draw the face, explaining the position of the eyes, nose, hair line, mouth and ears and part of the upper torso; like the neck and shoulders. (3) Encourage them to create texture and shading using charcoal. (4)
- Students start to practice drawing their faces on to cartridge paper with a charcoal stick, looking into a mirror. Allow most of the first session for the students to try to look, to search, to think and to try again until they feel more confident about their portraits. Allow students the freedom and space they require to draw.
- Students draw their portraits on the second piece of paper or on the canvas with coloured chalk. Encourage students to execute a simple line drawing of themselves, including a simple background. For the background, suggest that they think about places or things they like for example.
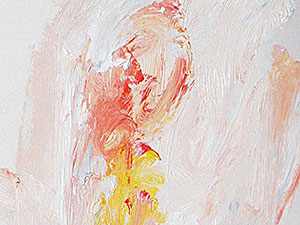
5. Mixing skin tones ready to paint with
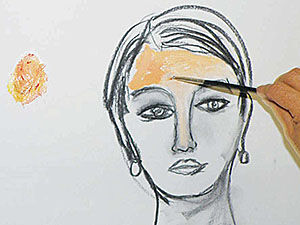
6. Applying skin tones to the charcoal drawing
Second Session
Demonstration on painting technique
- Demonstrate how to mix skin-tones, on the piece of paper provided for mixing paint, by starting with white and adding small amounts of yellow, red and then, by adding a small amount of black or blue if they desire a darker skin tone. (5 and 6)
- Demonstrate how to use the paint brush to apply the paint and then to clean the paint brush; firstly in water and then wiped clean with a rag to remove any excess before changing colours.
- Demonstrate how to paint on paper/canvas by applying paint wet on wet, how to paint using short brush strokes and how to paint using long brush strokes. (7 and 8)
- Students start painting by mixing the necessary colours for the skin, hair, eyes and applying paint on to large areas using their medium sized paint brush. Mid-school and upper-school students should be encouraged to add detail, such as lines in the hair, shadows along the nose, the eyes and sides of the face. (9) Younger students should paint the skin colour and hair colour first and then add detail to their painting.
Display and Evaluate
By the third session, students will be able to display their work and should be encouraged to talk about their self portraits. Use the four steps of art criticism: Describe, Analyse, Interpret and Judge to guide students with their comments.
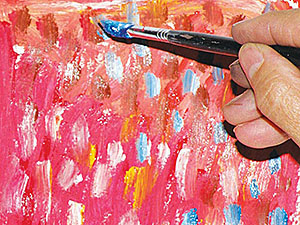
7. Applying paint using short brush strokes
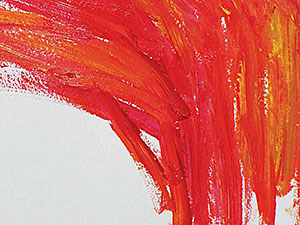
8. Applying paint using long brush strokes
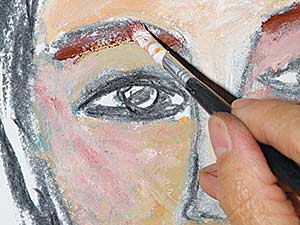
9. Applying paint using long brush strokes